10 Easy Pumpkin Ideas for Toddlers and Pre-schoolers
fun, seasonal activities for a play-based approach to learning
We love Halloween here and over the years, we have done our fair share of pumpkin themed activities. Now that I have made the decision to move all content from my website over to Substack, I am sharing some of our favourites.
The abundance of pumpkins during harvest season means that there are plenty of ways to play. This post is a round-up of our ideas for toddlers and pre-schoolers.
Age Recommendations
All of these pumpkin ideas are suitable for children aged from 3 onwards and are intended to be done under supervision. If your child is at the stage where they put items into their mouths avoid small object that might pose a choking hazard - pompoms and small beads, for example.
Benefits:
Fine motor skills: using kitchen utensils to work on pincer grip and hand strength as well as removing the seeds
Hand-eye coordination: to scoop and pour or apply stickers
Crossing the mid-line: using the tools to move the dominant hand across the body
Early Math: estimating / counting how many scoops it will take to fill the pumpkin gives children basic understanding of capacity
Role play: pretending to be in the kitchen and make a soup, pie or coffee
Connections to the world around us: understanding about seeds and how we can use them to grow more pumpkins in the future
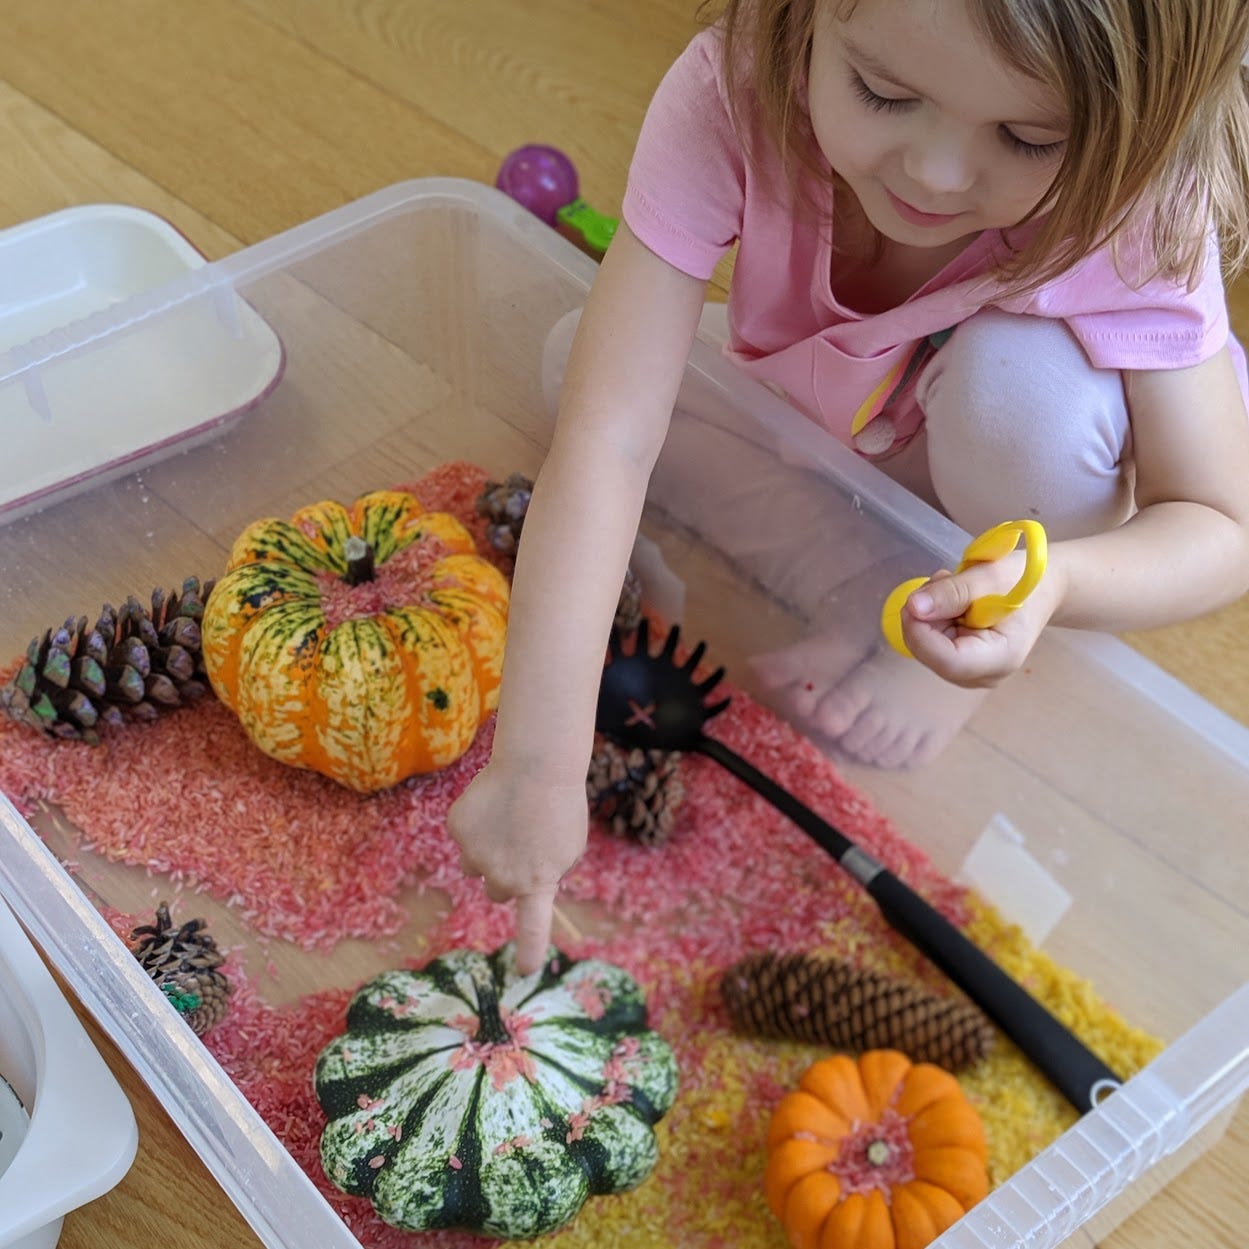
1. Pumpkin Patch
You will need:
Dyed rice in Autumn colours – we opted from red, orange and yellow
Pumpkins
Pinecones or other nature treasures
Assortment of kitchen utensils or fine motor tools
Recycling such as egg cartons and cardboard tubes for scooping and pouring
Large plastic tub
With these activities, I always leave them out as an invitation to play. I don’t have any set intention with how the play should go and keep my own involvement to a minimum. My daughter, who was 3 when we did this activity, spent some time trying to pick up the pumpkins with various tools and then used the utensils to scoop and pour rice onto the pumpkins.
To weave in a little maths, I asked my daughter which was the biggest and smallest pumpkin. Interestingly, she identified the green pumpkin as the biggest because it was in fact the widest. Another time I might extend this learning by weighing the pumpkins with her.
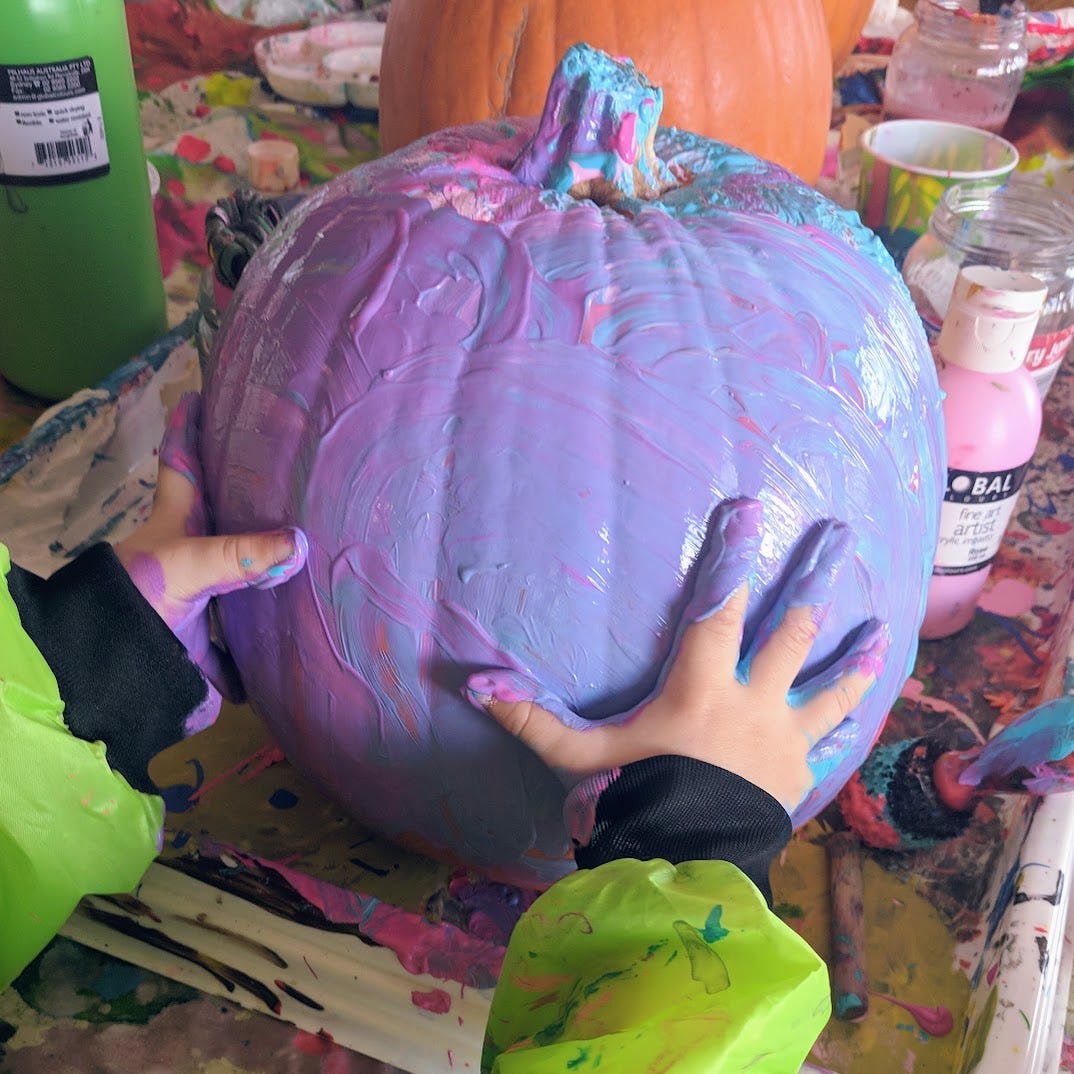
2. Pumpkin Process Art
Materials
Carving pumpkin
Non-toxic acrylics or washable paints
Supply of painting tools. e.g. sponges, brushes and rollers
Large tray
Wipes / wet cloths
Process art is hugely beneficial because it truly allows little learners to explore the materials on offer. There is no set task or intended end result so the children can really get stuck in! Process art allows children to develop the creative side of their brains through the medium of sensory play.
If you're looking for something creative, painting a pumpkin (without carving it), is one of the simplest ways to do this.
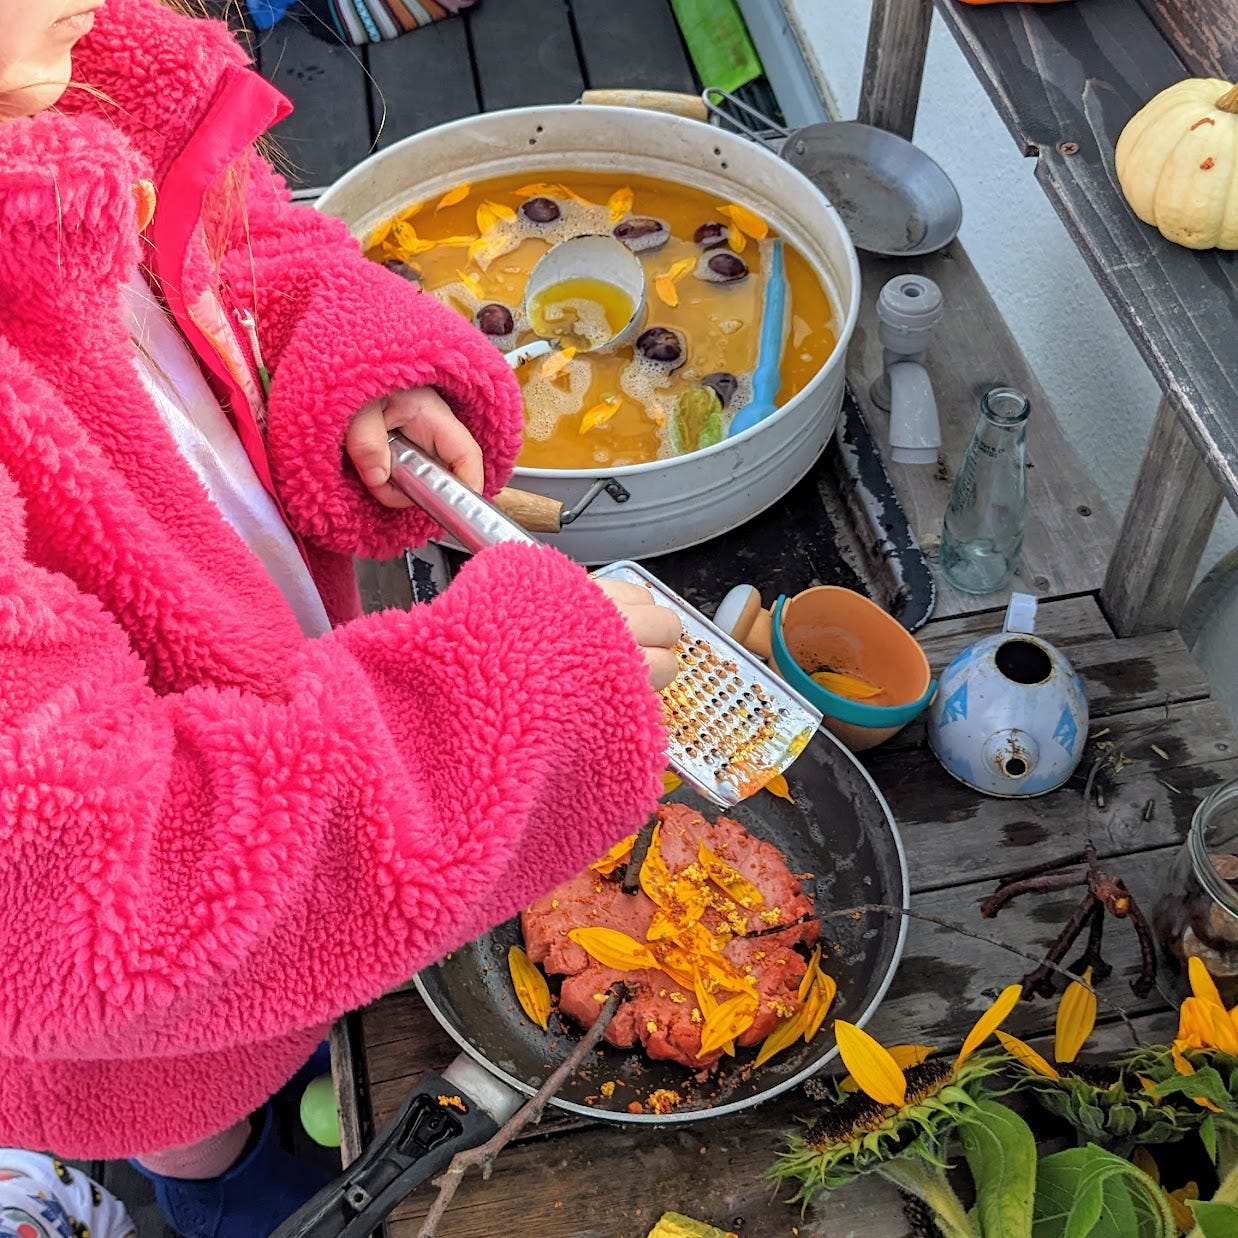
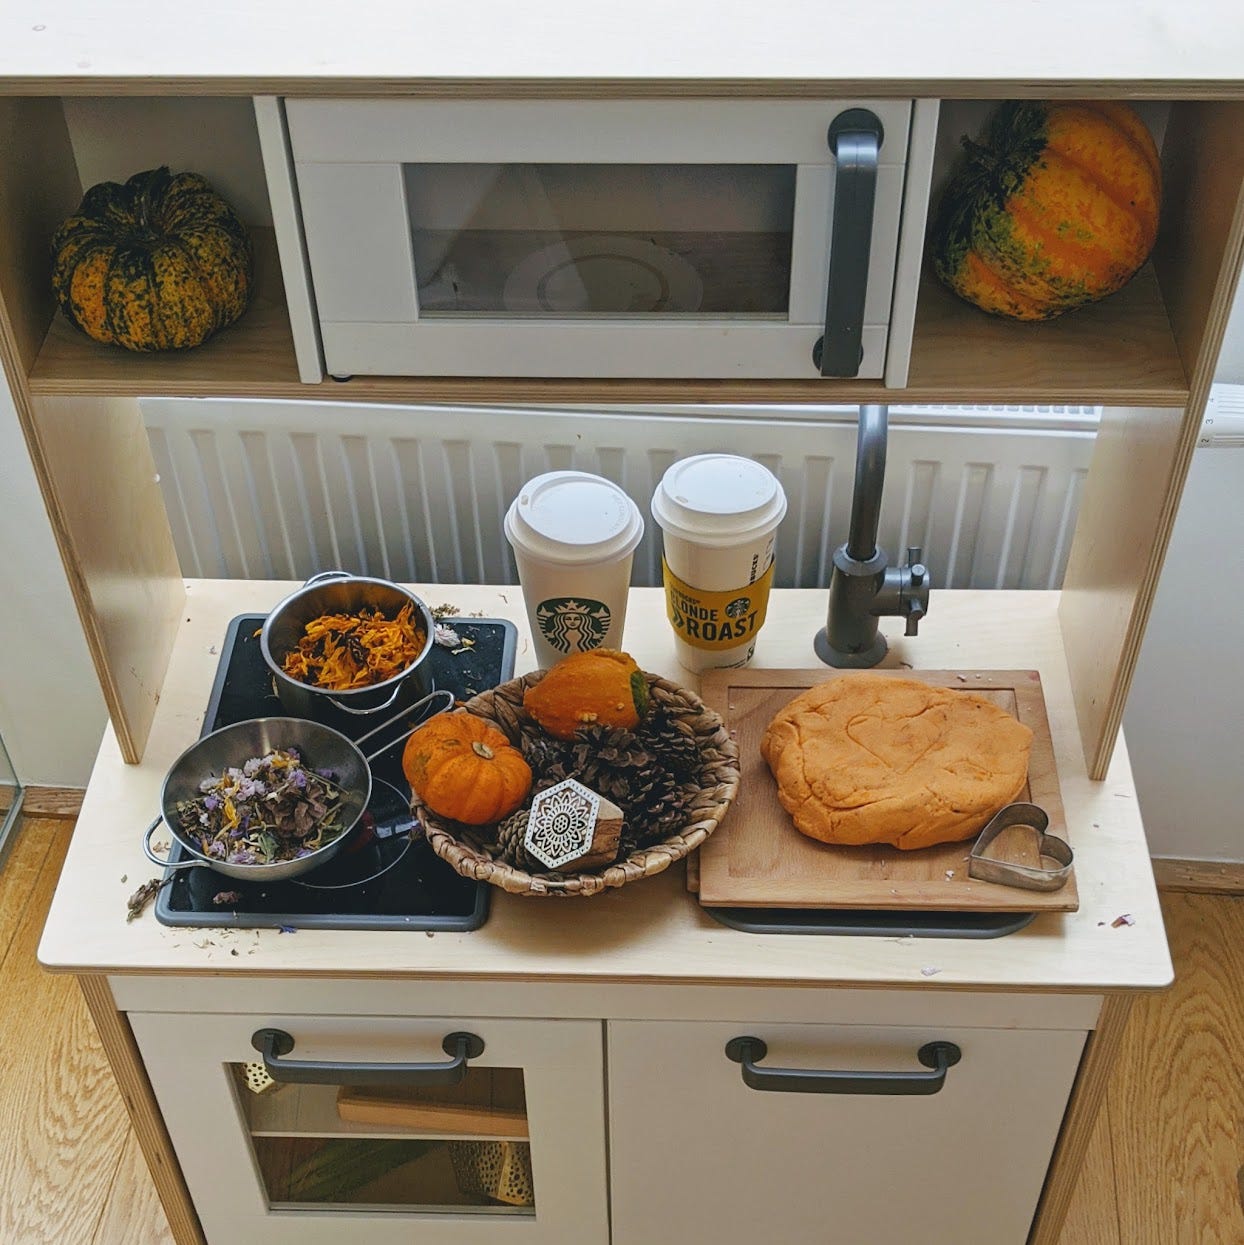
3. Autumn Themed Mud Kitchen
This is one of the best pumpkin ideas for minimising mess - simply taking the pumpkins outside for play means that they will eventually get recycled into the soil. We recently had a wonderful surprise when we noticed pumpkins growing in our small vegetable patch - some of the seeds from our mud kitchen play had managed to grow with no help from us!
4. Pumpkin Spice Play Dough
Okay so we all know that pumpkin spice isn't actually made from pumpkins, but you can still use them in a café themed dramatic play activity during the Autumn months.
You can read all about how to make pumpkin spice playdough here and get ideas on a pumpkin themed cafe here.
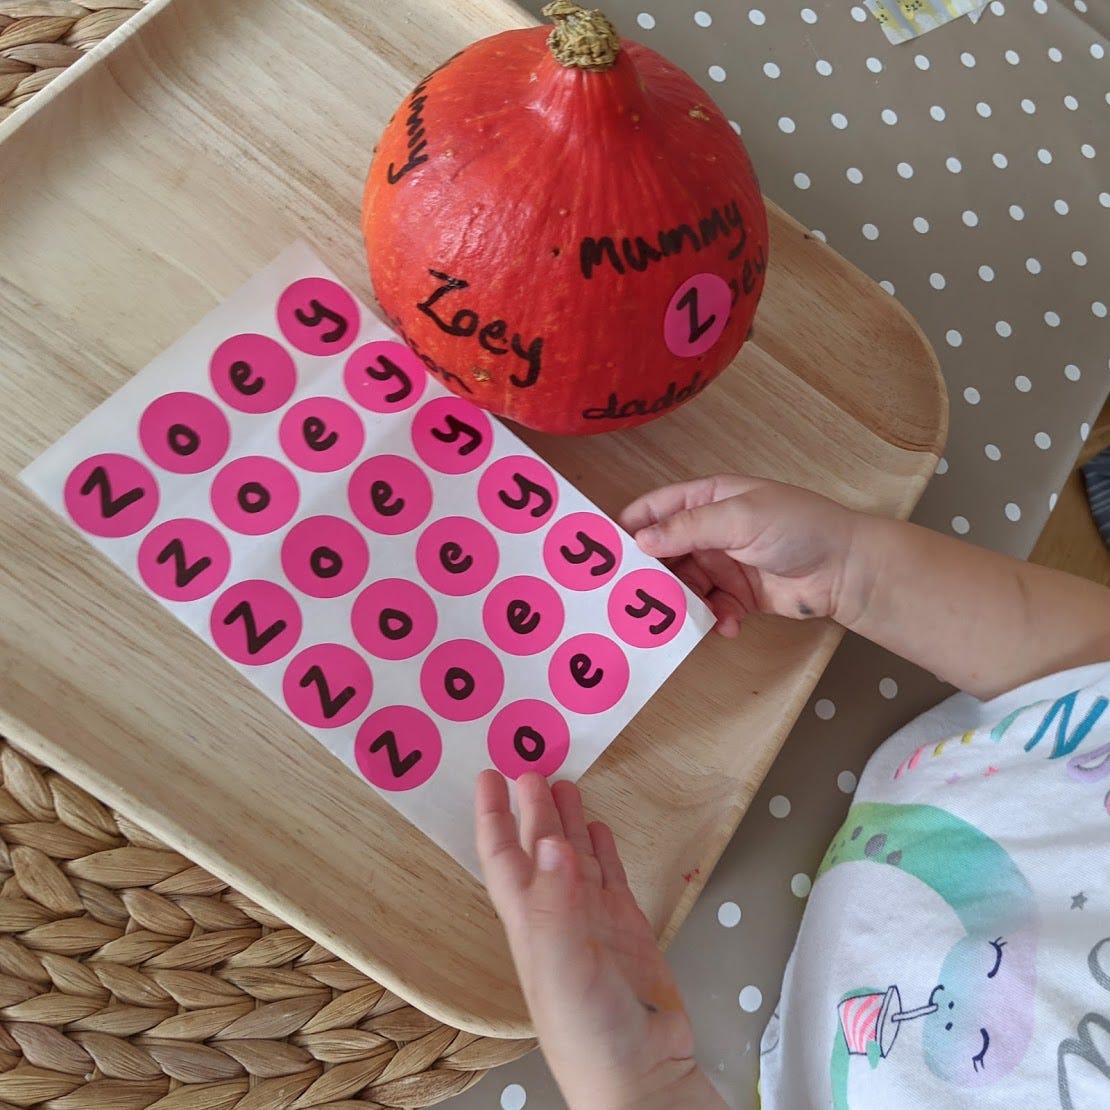
5. Pumpkin Name Recognition Activity
You Will Need:
Pumpkin
Black marker pen
Dot stickers or dot markers
What to do:
Write a selection of names on the pumpkin. As this was done at home, I opted to write all of the family names.
Write the letters of your child’s name onto the dot stickers for them to apply over the top of the name written on the pumpkin
For my daughter (aged 3.8 at the time) this was pretty self explanatory as we’ve done plenty of name recognition activities before. Start by asking the question, ‘Can you find your name?’ or ‘What letter does your name start with?’
If you have older children, you could even try asking them to find the other names on the pumpkin too.
This activity lasted for approximately 10 minutes before she started randomly applying the stickers. This is all okay, it’s never a good idea to force an activity beyond their attention span. The good thing about this one is that we can repeat again another day as the stickers come off the pumpkin easily too.
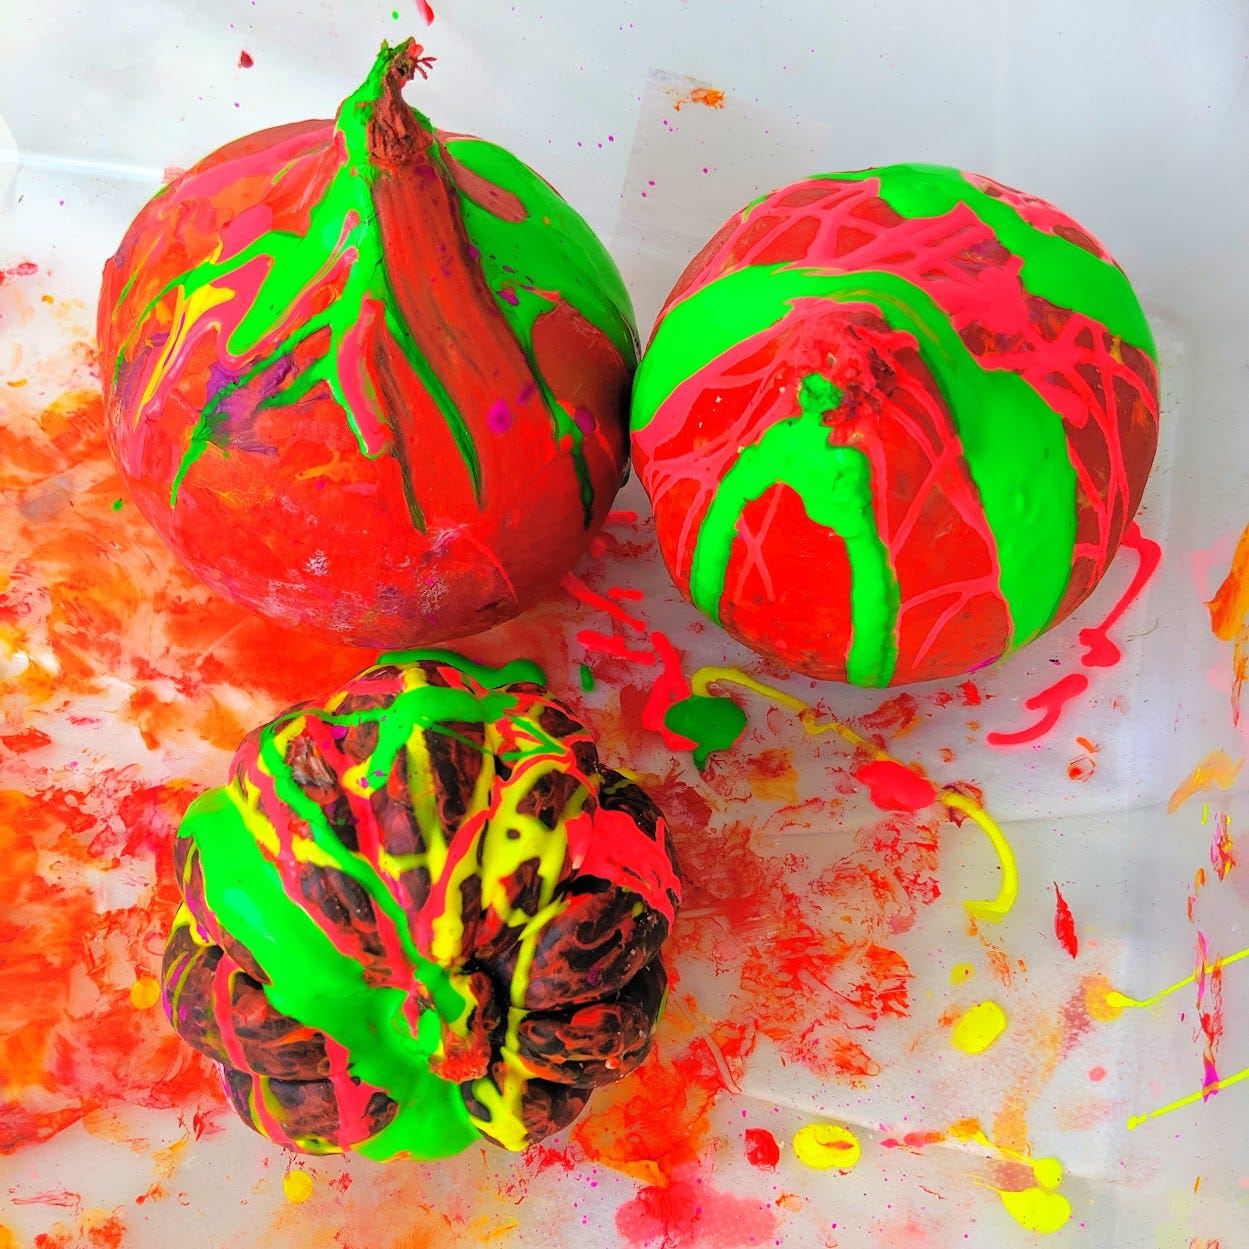
6. Pollock Pumpkins
Materials
IKEA Mala Paints
Non-toxic Washable paints
Paint palettes
Paintbrushes
Pumpkins
Drop sheet
Large Plastic tub
Reusable wet wipe
What to do:
When it comes to process art, I tend to invite the children to paint by laying out all the materials for them to access. I try to interfere as little as possible myself, save to ensure that energies are being focused on the activity in hand, rather than painting the furniture, walls etc!
I put the pumpkins into a large plastic tub in order to contain them a little better, then the kids got down to painting. It’s always amazing to see how little direction they need in order to do this.
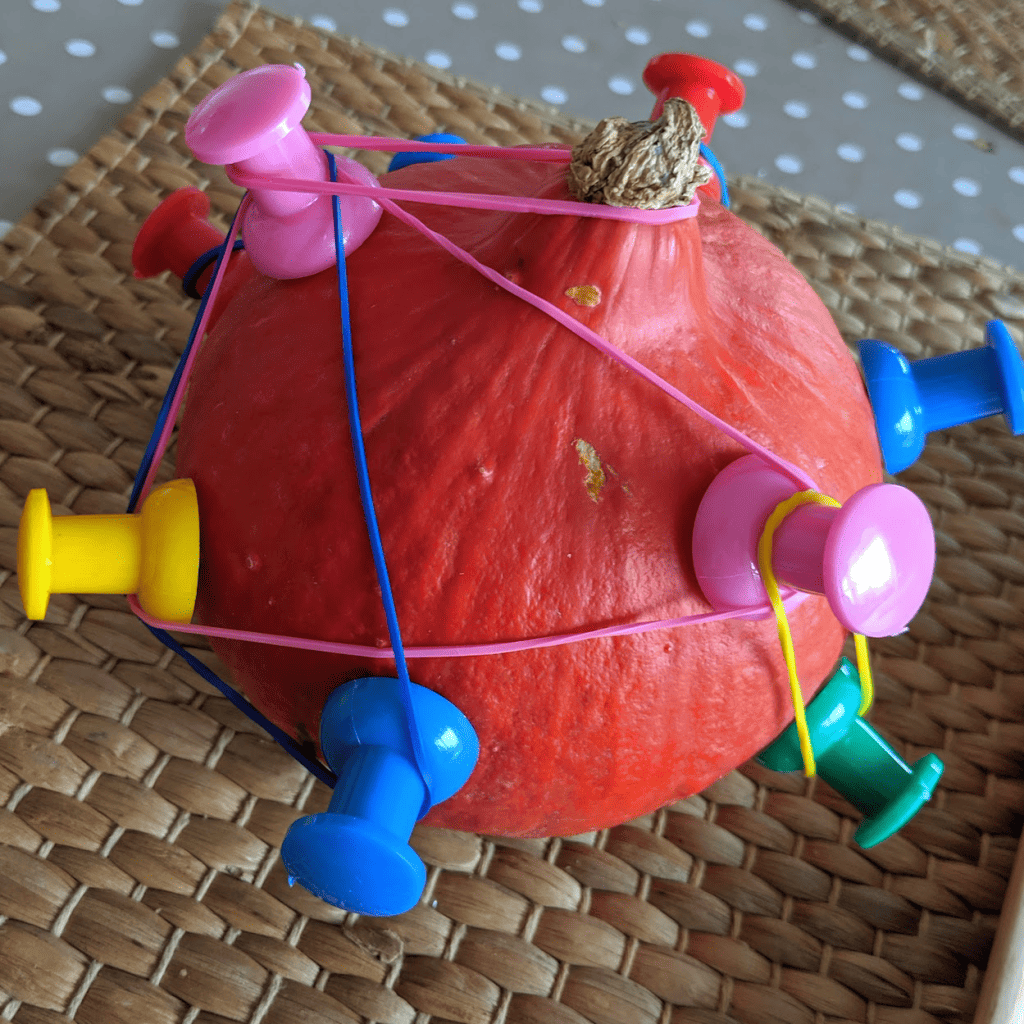
7. Gourd Geoboard
Supplies
Pumpkin
Drawing pins – these huge ones are from Flying Tiger
Elastic bands
What to do:
I simply pushed the drawing pins in the pumpkin, aiming roughly for triangular patterns for her to explore. It was far easier than I expected to push the pins in and it kind of ended up looking a little alien like!
Z has done many geoboard type activities before, so needed no instruction on what to do but if your child has no idea and isn’t sure, try modelling a few first.
Key Benefits
Early Math – by making shapes and lines.
Fine motor skills – stretching the elastic bands over the pins
The World Around us – making connections to the seasons and the produce available during autumn
Language development – talking about colours, shapes and seasons
8. Pumpkin Squish Bag
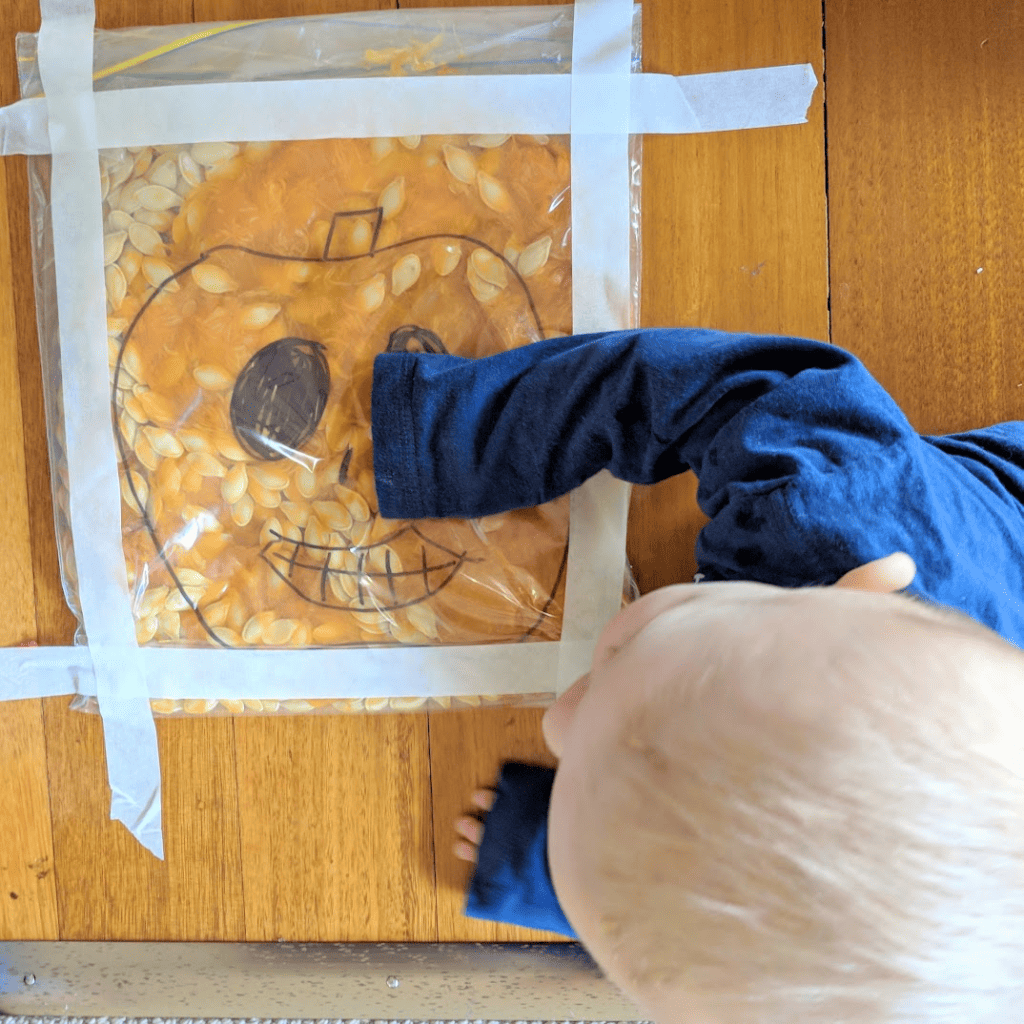
Pumpkin ideas don't just have to be for the big kids - this is one babies can join in with too.
You will need:
1-2 strong resealable bags (we use the zip-lock variety)
Permanent marker
The flesh and seeds from a pumpkin
Painters tape or masking tape
Method
Simply put the flesh and seeds from your pumpkin carving session in a ziplock bag for your baby or toddler to explore.
I drew a very quick pumpkin on the front of the bag with a permanent marker, but it isn’t strictly necessary for baby play.
If you’re worried about the bag breaking, you could try double bagging before taping it to the floor. If you don’t over-stuff the contents, you should avoid the bag ripping or tearing
9. Witches Brew
You will need:
Rainbow rice – you can find out about the traditional method here or read on below for this neon Halloween version
Googly eyes
Pom- poms
Halloween decorations
Fine motor scoop
Large tray (we used the tuff spot tray) or plastic tub
Hollowed out pumpkin – try keeping the innards for other activities!
Recyclables e.g. egg cartons
Kitchen utensils e.g spoons, cake tins and muffin pans
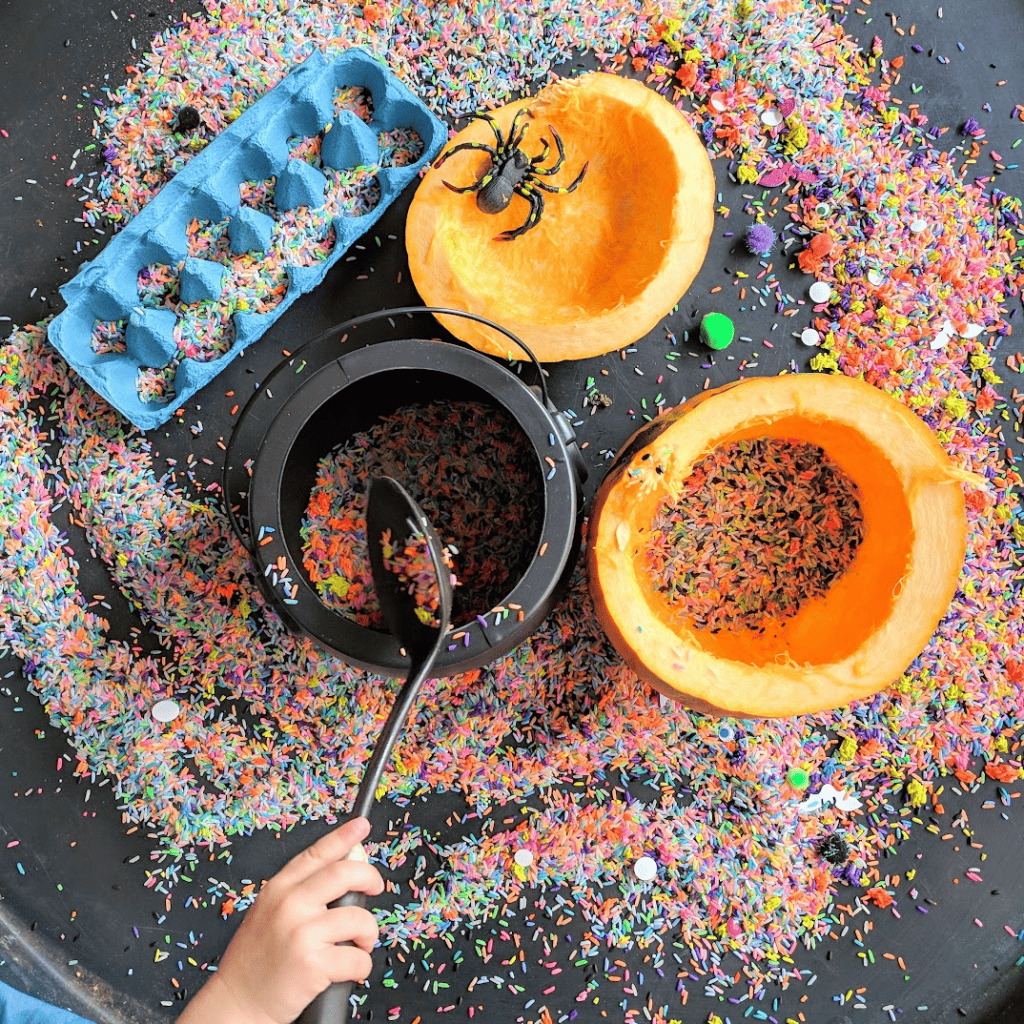
Most of the time, we make rainbow rice with food colouring and vinegar, however, unless you are willing to pay a lot of money for specialist dyes, then you will struggle to make more elaborate colours. To achieve the neon brights shown above we used non-toxic acrylic paints instead.
Separate a 1kg bag of rice into sandwich bags (approx 200g in each),
Add a teaspoon of non-toxic acrylics into the bag. We chose neon colours which also doubles well for ‘coral reef’ sensory play!
Squish and shake the bags until the colour is well mixed, adding a little more paint if necessary
Once fully covered, spread out on a baking tray lined with baking paper and leave to dry overnight.
The most important thing to note with this method is to add the paint slowly. If you have too much paint, then it dries in clumps which are hard to break apart! If you have overdone the paint, then you can always add more rice to the mix and fix it that way.
The beautiful thing rainbow rice is the fact it can last YEARS (when stored correctly in a sealed Tupperware box) so if you ever worry about food wastage, then this is a great option to try.
To note, the black rice featured here is simply black rice that I’d bought from a health food store and forgotten about! It came in handy for this Halloween activity.
The actual ‘witches brew’ activity really couldn’t be simpler. Place all of the materials, along with your dry Halloween rice for your little one to explore. The benefits of this activity include:
Fine motor skills: using kitchen utensils to work on pincer grip and hand strength
Hand-eye coordination: to scoop and pour the rice into different containers
Crossing the mid-line: using the tools to move the rice across the body
Early Math: estimating / counting how many scoops it will take to fill the pumpkin – basic understanding of capacity
Role play: pretending to be in the kitchen and make a potion.
10. Pumpkin Soup Scoop
One of the things I find really tricky about Halloween is buying a pumpkin but essentially wasting a lot of it in the name of decoration. I do really enjoy the decorative pumpkins so what I try to do is make the most with sensory play! This is one of the easiest pumpkin ideas on the list as you don't have to prep much.
Essentially, this is a really simple activity to try with your little ones. When hollowing out a pumpkin for decoration, let them help scoop the ‘innards’ out. Age depending, you might need to do most of the legwork in terms of loosening the flesh, but after that, it’s a lot of fun for the children to play pretend: making pumpkin pies of soup, for instance.
For an extra bit of fine motor work, you can even invite them to find all of the pumpkin seeds with their fingers or a fine motor tool so that they can be re-harvested for the following year. Now, I am no gardening expert, but I did find a useful article from Gardening Know How, which you can read here!
Need help with sensory play?
Sensory play is one of the modules available as part of the A Playful Year Membership. You can find out more here.


